Step1. Tools- A can of "cleaning duster" is definitely very handy to have. In addition, small tools for handling small parts.

Step 2. Take a photo of your Mac (Or don't and panic when things aren't back in the right places)
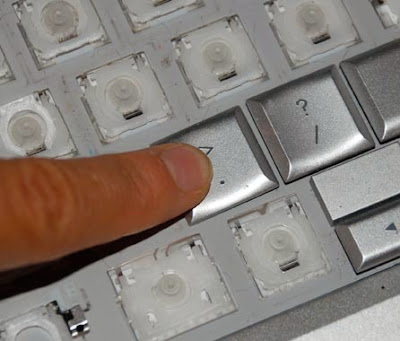
 Step 3. Key removal There are two parts to a keyboard key on an Apple Keyboard.
 1. Key cap.
2. The scissor mechanism, which is what holds on to the key cap.
To remove a Key cap, simply use your hand, or a flat head to lift one side, then gently pull up until the key cap pops up.

The scissor mechanism is basically two plastic prongs, the key cap is clicked onto both prongs. Be gentle when pulling the cap off the prongs.

One by one with patience, and so on... it takes about good 10 minutes to remove all the caps. Of course if you get better at it, it might take less, like everything else we do :)

Step 4. Cleaning the naked keyboard
Everyone has a way to clean stuff, I found some fun fact about cleaning a key board--
Everyone has a way to clean stuff, I found some fun fact about cleaning a key board--
 Until we clean our keyboard, we have no idea how dirty the key board might be (and can be, really!) Hairball, food crumbs, dirt, coffee stains, even dry sushi...(Ewww)
--------------------------------------------Dusting in progress---------------------------------------------
Now it's time to put things back in order! Yay!
My experience is to line up the clicks and the prong at one time, push the key cap until you hear the clicking sound (twice).

Then put the cap down, push it into the board, you should hear a few more promising clicking.
Also, I found it easier to just push the cap down and hope things line up.
Good luck to you! :)


thank you very helpful!
ReplyDelete